If your garage door is groaning, squeaking, or just not gliding as smoothly as it used to, it may be time for a little TLC. Learning how to lubricate garage door tracks and rollers isn’t just about quieting the noise—it’s essential maintenance that can extend the life of your door and improve overall performance. With the right lubricant, a clean cloth, and just a few minutes of your time, you can eliminate unnecessary wear and tear on moving parts like rollers, hinges, and bearings.
Quick Summary
- Lubricating garage door rollers, hinges, bearings, and springs reduces friction, noise, and rust, helping extend the door’s lifespan; wipe tracks clean but don’t grease the tracks themselves.
- Safety sensors prevent injury and damage by reversing the door when the beam is interrupted; keep sensors clean, aligned, and connected to avoid closing issues.
- Common sensor trouble signs include blinking/no sensor lights, the door reversing while closing, or needing to hold the wall button to close.
- Sensor problems are often caused by misalignment, dirty lenses, loose wiring, obstructions, or sunlight interference; testing involves interrupting the beam while the door closes to confirm reversal.
- DIY maintenance covers cleaning and lubrication, but professionals are recommended for sensor installation/repairs and high-tension components; choose local companies with good reviews, clear estimates, and brand compatibility.
Proper lubrication helps reduce friction, prevents rust buildup, and keeps everything running smoothly—especially in high-use homes or harsh climates. In this blog, we’ll also walk you through tips for sensor installation, choosing the right lubricant, and signs it might be time to call a professional garage door technician.
Importance of Safety Sensors
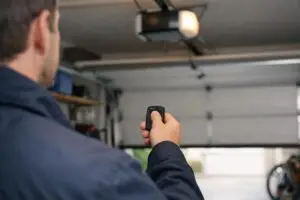
While lubrication keeps your garage door running smoothly, safety sensors ensure it operates safely. These small components near the base of your door track might not look like much, but they play a big role in preventing injury and property damage. If the sensors detect an object in the path of the closing door, they immediately reverse its direction.
Malfunctioning sensors can lead to accidents, or even cause the door to refuse to close entirely. That’s why keeping them clean, aligned, and properly connected is just as important as greasing the rollers. A well-maintained garage door system is not just about convenience—it’s about protecting your family and home.
Understanding Safety Sensors
Garage door safety sensors work by sending an invisible beam from one side of the garage to the other. When something interrupts the beam, the door won’t close. However, sensors can become misaligned, dirty, or disconnected over time, which means your door might act up even when there’s nothing in its way.
Keep an eye out for:
- Blinking sensor lights or no light at all
- A door that starts to close, then reverses suddenly
- Needing to hold the wall button down to fully close the door
If you’re experiencing these issues, it might not be the rollers or tracks—it could be your safety sensors needing attention.
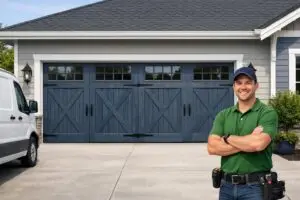
Hiring a Professional Service
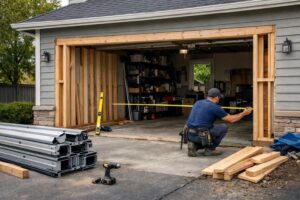
While DIY maintenance is great for quick fixes, some garage door problems require a professional’s expertise—especially when dealing with electrical components like safety sensors or high-tension parts like springs and tracks. A professional garage door technician can safely install, repair, and test all parts of the system while ensuring everything meets local safety standards.
Hiring a trained expert also means saving time and avoiding costly mistakes. They can identify whether you’re dealing with dirty tracks, faulty ball bearings, or more complex alignment issues that require more than just a can of spray lubricant.
Researching Local Companies
Start your search by narrowing it down to professionals who specialize in garage door repair and maintenance in your area. Look for companies that:
- Have strong customer reviews and a local presence
- Offer services like garage door spring repair, sensor installation, and opener maintenance
- Work with a wide range of garage door brands and parts
- Provide detailed estimates and clearly explain their process
Whether you’re in a city like Seattle or a smaller King County community, choose a garage door company that understands the local weather, home styles, and common issues in your region.
Asking for Recommendations
When it comes to hiring someone to work on your home, nothing beats a personal referral. Ask friends, family, or neighbors who they trust for garage door maintenance and repair. Online forums and local Facebook groups can also be great places to gather input.
Here’s a simple checklist when asking for recommendations:
- Did the technician arrive on time and prepared?
- Was the job done efficiently and safely?
- Were prices fair and transparent?
- Has the repair lasted over time?
You’ll get the most reliable answers from people who’ve had similar garage door needs—whether it’s roller replacement, sensor repair, or help choosing the right lubricant like white lithium grease or silicone spray.
Assessing the Area
Before installing new garage door sensors, it’s important to evaluate the layout of your garage. Factors like sunlight exposure, clutter near the door tracks, and door width can all affect sensor performance. For example, direct sunlight can interfere with infrared beams, and stacked storage can block the path entirely.
During a professional installation, technicians will:
- Check for potential signal interference
- Clean tracks and remove dust or debris
- Adjust sensor height to align with standard safety guidelines
- Inspect the wiring and power supply to avoid connection issues
A thorough assessment ensures the sensors won’t just work on day one—they’ll keep working reliably for years to come.
Choosing the Right Sensors
Not all garage doors use the same sensor type. Depending on your opener model and the age of your system, you may need specific sensor brands or mounting styles. Universal sensors may seem like a quick solution, but they don’t always offer long-term reliability.
Here are a few sensor selection tips:
- Match your opener brand: LiftMaster, Genie, and Chamberlain all use slightly different setups.
- Avoid mixing old and new: If one sensor fails, replace both for consistent signal strength.
- Look for quality wiring and clear installation instructions.
A professional can help you select compatible, high-performance sensors designed to work seamlessly with your system—saving you from wasted time or incorrect parts.
Installation Process
Once you’ve selected the right equipment, it’s time for installation. While it may seem straightforward, aligning sensors and connecting them to the garage door opener can get tricky without experience.
🔧 Here’s what happens during a typical installation:
- Mounting sensors on each side of the door track
- Using brackets and bolts to secure them at an even height
- Ensuring nothing blocks the path between them (tools, dirt, etc.)
- Running wires neatly and safely back to the opener unit
- Using spray cleaner to remove dust and grease from mounting areas
- Checking that both sensor lights turn solid, indicating alignment
Proper installation sets the foundation for smooth, safe garage door performance.
Setting Up Sensors
When setting up new garage door sensors, alignment is everything. The sensors must be placed directly across from each other at the same height and with no obstructions between them. Most models will include a small LED light that turns solid when the alignment is correct. If the light is blinking or off, it means something’s wrong—likely dirt on the lens, misalignment, or a loose wire.
Be sure to:
- Wipe the lenses with a clean, dry cloth to remove dust
- Use a level to check alignment
- Secure all mounting brackets to avoid shifting over time
Once aligned, sensors can be wired into the opener unit, and the system is ready for testing.
Testing Sensors
After installation, it’s time to test sensor functionality. Try closing the garage door with the remote or wall switch, then wave a broomstick or cardboard box through the beam while the door is closing. If the door stops or reverses, the sensors are working properly.
If the door doesn’t react:
- Recheck alignment
- Ensure both lights are solid
- Look for any obstructions or wiring issues
Testing your system ensures you’re not just installing hardware—you’re restoring a layer of safety to your garage door system.
Repair and Maintenance
Just like the rollers, springs, and opener, sensors need periodic attention to stay in working order. Environmental factors like dust, temperature swings, and moisture can all impact performance. The good news? A little preventive care goes a long way.
🛠️ Regular maintenance steps to keep in mind:
- Clean sensors with a soft cloth every few months
- Check for blinking lights or flickering beams
- Keep the sensor area free of clutter and cobwebs
- Don’t use harsh chemicals near sensor lenses
- Watch for loose wiring or signs of rust around the brackets
Small checkups can help you avoid sudden malfunctions or costly repair calls.
Troubleshooting Common Issues
Even with regular maintenance, things can still go wrong. If your garage door won’t close or only works when holding down the wall button, chances are your sensors are acting up. Luckily, many sensor issues are easy to identify and resolve.
Here are the most common garage door sensor problems:
- Misalignment: One sensor is knocked out of position, breaking the beam.
- Dirty lenses: Dust, debris, or spiderwebs are blocking the signal.
- Loose wires: Vibration or corrosion causes intermittent connections.
- Sunlight interference: Harsh rays hitting the lens can confuse the sensor.
A quick visual inspection and realignment can solve most of these issues. If not, calling a technician ensures safe, reliable operation without guesswork.
Regular Maintenance Checks
Alongside troubleshooting, scheduled maintenance helps prevent breakdowns before they happen. Plan to check your garage door tracks and rollers at least twice a year—and lubricate as needed using white lithium grease or a silicone-based spray.
Include these steps in your routine:
- Inspect nylon rollers for cracking or wear
- Apply lithium grease to ball bearings and moving parts
- Clean excess grease buildup to avoid dust and dirt collection
- Lubricate hinges and torsion springs lightly
- Wipe the tracks with a cloth to remove buildup (don’t grease the tracks themselves)
Routine care not only reduces noise but extends the lifespan of your garage door components.
Ensuring Proper Functionality
At the end of the day, safety sensors and smooth rollers go hand in hand to make your garage system work like it should. You’ll save time, reduce stress, and avoid emergency repair costs by staying on top of these details.
Whether you’re applying fresh lubricant, aligning a stubborn sensor, or scheduling a professional garage door service, keeping every part of your system running smoothly helps protect your investment.
Monitoring Sensor Performance
Watch for subtle signs of trouble—like a delay when closing the door, flickering sensor lights, or new grinding noises from the rollers. These might seem small at first, but they’re your door’s way of telling you it’s time for some attention.
Addressing Any Malfunctions
If your troubleshooting and maintenance efforts don’t fix the issue, don’t wait. Reach out to a trusted technician to get answers and restore full functionality. Whether it’s worn-out parts, electrical problems, or a need for complete sensor replacement, professional help ensures the job is done safely and correctly.