Garage door safety sensors are one of those little home features we don’t think about—until the garage door refuses to close. These small devices are essential to keeping your automatic garage door running safely, protecting kids, pets, and your car from accidents. When they stop working, it’s more than a small inconvenience—it’s a safety issue.
Quick Summary
- Verify opener has power: check plug, outlet, and reset any tripped breaker or blown fuse.
- Inspect sensor wiring for loose, frayed, corroded, or wet connections; note any blinking/off sensor lights.
- Clear the sensor path and clean lenses with a soft cloth; remove dust, cobwebs, tools, toys, or boxes.
- Realign sensors so both indicator lights are solid; match heights and tighten brackets, and reduce direct sunlight.
- Reset by unplugging or flipping breaker 30–60 seconds, restore power, then retest; call a pro if lights stay off.
If you’re dealing with sensor issues and wondering how to reset garage door safety sensors that aren’t working, you’re in the right place. This blog will walk you through the simple troubleshooting steps, from power checks to alignment fixes, and help you know when it’s time to call in a professional.
Check Power Source
Before you start fiddling with the sensors themselves, take a moment to rule out the most basic issue: a power disruption. If your garage door opener isn’t receiving power, the entire garage door system—including the sensors—won’t function properly.
Inspect Power Supply
Start by checking that your garage door opener is plugged into a working outlet. Sometimes, the plug can come loose from vibrations or accidental tugs. Try plugging something else into the outlet to verify it’s working.
If the outlet works fine but the opener still isn’t responding, the issue could lie deeper in your electrical system. This might involve a blown fuse or a tripped circuit breaker. Head over to your home’s breaker panel and look for any switches in the off position. Resetting the breaker could restore power to the entire garage.
Check Electrical Connection
Garage door sensors rely on a steady connection to the opener’s power source. Inspect the wiring that connects the sensors to the motor unit—look for signs of fraying, corrosion, or disconnected wires. A loose or damaged wire can cut power to one or both sensors, causing them to malfunction.
Here are quick things to check:
- Look for blinking sensor lights—if one is off or flashing, that’s your troublemaker.
- Gently wiggle the wires to see if they’re firmly in place.
- Don’t forget to check for moisture or rust around wire terminals, especially in humid garages.
Clear Obstructions
Even when the power is flowing and the wiring looks good, garage door sensors can stop working if something blocks their line of sight. These sensors work like a laser tripwire—if anything interrupts the beam, the door won’t close.
Remove Debris
Start with a visual inspection of both door sensors. Look for dust, cobwebs, leaves, or small tools that might be sitting in the path between the sensors. Even a thin film of dirt on the sensor lens can interfere with the beam.
Use a soft cloth and mild cleaner to gently wipe the lenses on both sensors. Avoid using harsh chemicals or pressing too hard, which could scratch or misalign them. Be sure to clear the area around the sensors as well—things like brooms, boxes, or toys may be just enough to disrupt the signal.
Adjust Sensor Alignment
Once everything is cleared, check the sensor alignment. The two sensors need to face each other directly in order to communicate. If one is tilted or bumped out of position, the connection will be lost, and your garage door won’t budge.
Here’s how to realign them:
- Loosen the mounting brackets slightly so you can move the sensors.
- Adjust each sensor until their indicator lights glow steadily—this means they’re locked onto each other.
- Tighten the brackets again to hold the alignment.
💡 Troubleshooting Tip: Direct sunlight can sometimes interfere with sensor signals. If your sensors are installed near windows or open doors, try blocking sunlight temporarily to see if the issue resolves.
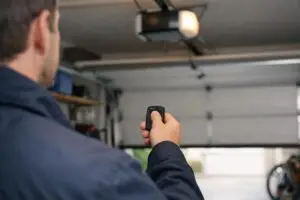
Test Sensor Functionality
Once you’ve cleared any debris and aligned the sensors, it’s time to verify whether they’re working as intended. A properly functioning set of garage door sensors should allow the door to close normally and stop or reverse if something crosses the beam.
Align Sensors Properly
If the indicator lights on both sensors are solid (usually green or amber), that’s a good sign. However, if one or both are still blinking or off, you may need to revisit their alignment. Even a slight shift—like a bumped sensor bracket—can be enough to throw off the beam.
Double-check for:
- Matching sensor heights on both sides
- Tight bracket screws
- A straight line of sight between the two units
Misalignment is one of the most common causes of garage door sensor issues, especially after accidental contact or vibrations over time.
Test Garage Door Operation
With the sensors aligned, test your garage door. Try closing it using the wall-mounted button or remote. If the door begins to close smoothly and completes the cycle, your sensor alignment was likely the culprit.
If the door still won’t budge or reverses immediately:
- Look for flashing lights on the garage door opener
- Double-check for any remaining obstructions
- Try waving your hand between the sensors while the door is closing to ensure the beam reacts properly
🔍 Here’s a quick sensor function checklist:
- Are both sensor lights solid and on?
- Does the door respond when the beam is interrupted?
- Does the door stay closed once it completes its cycle?
If everything checks out, you’ve likely solved the issue. If not, don’t worry—next we’ll walk through how to reset the sensors themselves.
Reset Sensors
If your garage door sensors still aren’t cooperating, even after cleaning, checking power, and realigning, it may be time for a manual reset. While not every issue requires a reset, it’s a helpful final step before calling in a technician.
Consult Manufacturer Instructions
Before attempting a reset, it’s always a good idea to check the manufacturer’s manual or website for specific instructions. Different garage door openers may have unique reset procedures or require special tools. Many manuals are available online if you no longer have the paper copy that came with your opener.
Look for guidance specific to:
- Sensor reset buttons or programming modes
- Light code explanations (e.g., blinking patterns that indicate sensor issues)
- Instructions tied to your opener model (Chamberlain, LiftMaster, Genie, etc.)
Perform Sensor Reset Procedure
Once you’ve reviewed the instructions, follow the reset steps for your garage door system. In most cases, it involves cutting power briefly and allowing the system to reboot.
Here’s a general step-by-step guide to try:
- Disconnect power to your garage door opener by unplugging it or flipping the circuit breaker.
- Wait 30–60 seconds to allow the opener’s internal electronics to fully discharge.
- Plug the opener back in or reset the breaker to restore power.
- Check the sensor lights—if they both come on and remain solid, the reset may have worked.
- Test the garage door again to confirm normal operation.
If the sensors are still malfunctioning, the issue may not be with the settings, but with the wiring, internal circuitry, or even the sensors themselves—especially if they’re old or exposed to harsh environments.
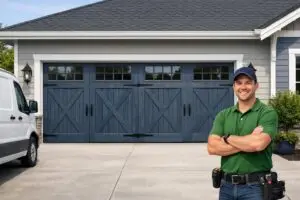
Contact Professional Help
If you’ve gone through every step and your garage door sensors are still giving you trouble, it might be time to call in a professional. While many sensor issues are easy for a homeowner to troubleshoot, some problems—like damaged wiring or a failing garage door opener—require expert attention.
Seek Professional Assistance
A certified garage door technician can quickly diagnose and repair complex issues, especially when the problem lies deeper in the system. They’ll inspect the opener, wiring, sensors, and even the motor to ensure everything’s functioning safely.
You should consider professional garage door sensor replacement or repair if:
- The sensor lights stay off even after reset and realignment
- You notice damaged wires or burnt smells near the opener
- The door still refuses to close despite no visible obstructions
- One sensor is clearly defective or completely unresponsive
⚠️ Garage doors are heavy, and safety features exist for a reason. Never bypass or disable your garage door safety sensors just to get the door working—it puts people, pets, and property at serious risk.